Quick Summary
Part 2 in this article series includes more detailed information and guidance on how we conducted the Minitex Wikimedia pilot; what you would need to know if you wanted to try it at your organization, and links to the templates we created and other resources we used.

In 2023, Minitex and three organizations conducted a small pilot to learn more about using the free wiki-based media repository called Wikimedia Commons, along with its sister sites Wikidata and Wikipedia, to increase discoverability of content from digital collections. Read on to learn exactly how we did it! If you are interested in reading an introduction to the pilot project and findings, see the article Making Digital Collections More Discoverable, Part 1: Wikimedia.
Selection, Copyright, and Administration
Before beginning any uploads, pilot participants discussed selection criteria for the material they intended to add to Wikimedia Commons. The University of Minnesota Libraries looked at several different collections in their UMedia digital repository with an eye toward bringing better discoverability to underrepresented people and content. The Blue Earth County Historical Society focused on selecting content they had in the Minnesota Digital Library (MDL) that represented the county’s many communities (towns, townships, businesses, landmarks). Minnesota State University Mankato looked at their MDL collection, and chose content that best represented their campus community. Having a specific thematic focus, or set selection criteria is certainly helpful when starting a project like this, especially if you have more than 25 objects to choose from (25 objects from each participant was a goal from the pilot).
It is also important to consider the copyright status of the material you are working with. Items uploaded to Wikimedia Commons must be either 1) in the public domain in both the United States and in the source country of the work, OR, 2) freely licensed (and documented as such). Contrary to other digital collections platforms, Wikimedia Commons does not accept fair use or non-commercial only licenses, so make sure you are clear on the status of each item you have selected.
For purposes of our project, we all selected images that were No-Copyright United States. This provided peace of mind about the content we were uploading and also made things easier when we entered metadata into the Commons Upload Wizard (see below).
Finally, you’ll need a free account within Commons to upload content. To create an account, go to the Create Account home page. Select a Username and Password, and enter an Email address to be linked with your account. Note that your username is public and will be associated with all content and edits.
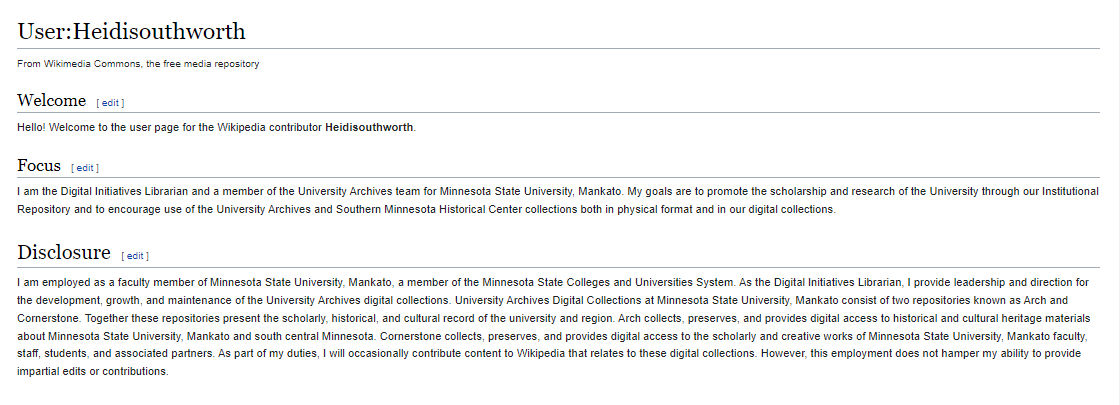
If you are creating an account on behalf of your institution or organization, we also recommend adding a description to your "User Page" disclosing your affiliation with the content you are uploading. This is fairly common practice within the larger Wiki community and (we feel) also aligns with larger cultural heritage community goals emphasizing transparency and ethical stewardship of materials.
Uploading to Wikimedia Commons
Once you’ve decided on the content you’d like to feature, confirmed its copyright status, and created an account, you’re ready to upload the files.
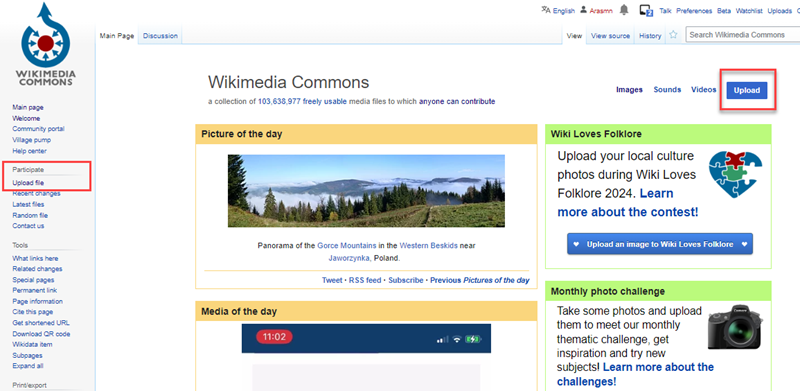
To get started, log into your Wikimedia Commons account. On the left-hand side, under "Participate," click “Upload File” to open the Upload Wizard. Or look for the blue “Upload” button in the top right corner of the homepage.
In the Upload Wizard, click on "Select media files to share." Locate the file from your computer (we recommend creating a desktop folder with copies of the content you’ll be uploading) and click “open.” (You can also drag and drop the file into this upload screen).
If the file is successfully uploaded, the next screen will show the uploaded image and a green checkmark. Click "continue" to move forward.
Note on file formats
As is true with most online collections, Wikimedia Commons recommends users upload images at the highest resolution available.
- The Maximum File Size for any media is 5 GB.
- For Photographs, the file format should be a JPEG.
- For Scanned Graphics and Low Color Depth Images, the file format should be PNG.
- For Diagrams, Charts, Illustrations, Maps, or any other Graphic that needs a Label, the file format should be SVG.
- For Audio, the file format should be Ogg. MP3 can be used if Ogg is not available.
- For Video, the file format should be Ogg Theora, WebM (AV1, VP9, and VP8), or MPEG-1 and MPEG-2.
- Do not use GIF, TIFF, or BMP file formats.
- While PDFs are allowed for documents; individual JPEGs or PNGs of each page are preferred
- The Wikimedia Commons help pages provide great information on how to convert formats like WAVs or MP3s to these preferred formats.
More upload tips and tricks
- Make sure you are using a consistent file naming schema (and descriptive metadata) when uploading materials. This can help with tracking content across multiple platforms and repositories (i.e., viewing stats for the same image on Commons and your MDL collection).
- Be mindful about any embedded metadata in your files. For example, some scanning equipment automatically includes the name of the computer or software used to create the scan. What are you sharing? And are you comfortable with sharing this information? Edit any personal embedded metadata in your file before uploading content. The upload wizard does a good job reminding you of these considerations, and includes a tutorial on how to view and remove any embedded (EXIF) metadata.

Adding Metadata
Once you have selected an item to upload to Wikimedia Commons, you will next need to add required metadata that not only describes the item but reflects its copyright or release rights status. Wikimedia Commons has an Upload Wizard that helps to navigate through the process of adding the metadata to the fields. If you have contributed digital objects to the Minnesota Digital Library or your own digital repository, you should already have good metadata that you can easily use for Wikimedia Commons..
The metadata that goes into each part of the wizard’s template varies, but our group wanted to have some general agreement on how we interpret what should go into each field. A small subgroup made up of Sara Ring, Greta Bahnemann, and Heidi Southworth met to create our own metadata template for use in the pilot project and presented it to the group for feedback. Our pilot Wikimedia Commons File Information Template Guidelines helped us with entering metadata for such fields as Caption, Author, Description, Date, Source, Category (similar to subject), Standardized Rights Statement, and Release Rights/Licensing fields. Used in conjunction with the Upload Wizard in Wikimedia Commons, the template walks you through adding the metadata after you have uploaded an item.
The first section of the Upload Wizard, Release Rights, will ask you about copyright. There are 2 options:
- This is my own work and anyone is free to use it. – Use this if you are uploading a work of your own (ex. A photograph that you took, media created by you, etc.).
- This is someone else’s work and is free to share. – Use this if you are uploading a work that belongs to someone else but is free to share (ex. Work has entered the public domain).
After selecting one of these options, the Wizard will walk you through a series of questions concerning copyright. If you do not know who holds the copyright, you will need to research this before proceeding. Click "Next" to move on once you have completed this section.
Now, for the following sections, you will get to the really fun part - entering metadata!
- For image title, enter a unique descriptive title using plain language. Sound familiar? You can utilize the title from the item in your own digital repository, or from the item in your Minnesota Digital Library Collection.
- For caption, enter a one-sentence explanation of what the file represents. This would be the most important information about the item. Keep this to one sentence as you can enter more in the description.
- For description, enter additional information about the item. Again, you can use the description from your repository or the MDL.
- Date work was created or first published is next. In the Upload wizard, you can select the calendar icon to choose a date if you have an exact date (yyyy, mm, dd), otherwise, select the pencil tool for any other type of date (yyyy or yy-mm, etc). Dates should be expressed as follows:
- Year only: use when only the year is known. Record in the form of yyyy
- Year and Month: use when the year and month are known. Record in the form yyyy-mm
- Year, Month, Day: use when the exact date is known. Record in the form yyyy-mm-dd
- Date Range: use when date is uncertain but falls within a likely range. Record the earliest and latest dates separated by one space-a hyphen-one space in the form of yyyy - yyyy.
- Categories are subjects you can use in Wikimedia Commons that group related items together. In the pilot we aimed to apply at least 3-5 categories to each item. In addition, all of us created a category that we applied to our own submissions so that they would be grouped together. We all started out the same (Media contributed by…) and then added our organizations. For example, “Media contributed by the Blue Earth County Historical Society.” We also used place names to identify locations and generic subjects like, “Universities and colleges in Minnesota,” or “University buildings” to group items together. For a step-by-step guide to creating categories, check out the North Dakota State Library’s Creating Categories & Subcategories on Wikimedia Commons. Here are the links to our category pages:
All done? All you have to do is click on "Publish files" to move to the next step. Note that all of the metadata that you enter is considered automatically to be in the public domain, so be mindful of this as you fashion your data.
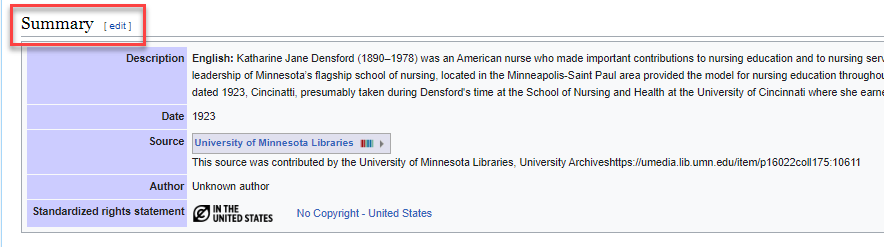
All of the metadata that you publish appears in Wikimedia Commons in the File Information and Summary sections. When we created our File Information Template Guidelines for the pilot, we decided that we wanted to edit one of the fields, Source, to appear like the DPLA example, and we wanted to add the Standardized Rights Statement to appear in the summary section. When we tried to do this, however, we realized that we could not edit this in the Upload Wizard. Instead, we had to edit the wikitext after we had published the metadata files. Wikitext is the markup language used by Wikimedia Commons to structure and format the text. You can find more information on wikitext on their help page.
To edit the wikitext, all you need to do is click the "edit" link next to the Summary heading on the item in Wikimedia Commons.
A nice feature of the wikitext editor is that you will see a preview of your edits on the right side of the screen, so you can see exactly what the final product will look like.
Information on how we edited the wikitext for Source and Standardized Rights Statement are found in our pilot Wikimedia Commons File Information Template Guidelines. Here are a couple of things to note about editing the Wikitext:
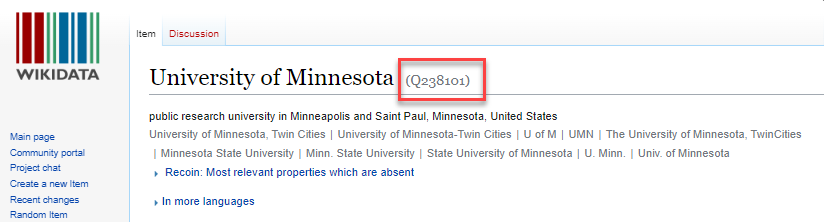
- Before you edit your Source in wikitext, you will need to search Wikidata for your organization’s name to find your unique “Q” number. It will appear next to your name in Wikidata like this:
- If you do not find your organization’s name, you can learn more on how to contribute to Wikidata on their help page or through a step-by-step tutorial.
- You may also wish to create your own version of a standardized statement for your Source. For example, we all used a variation of this statement: This item was contributed to the Minnesota Digital Library by [insert organization name]. We hyperlinked the words “Minnesota Digital Library” to the source image found in the MDL. You can link to any Source (URL of the digital object) or change the wording to fit your repository name. Here is a finished Source example:
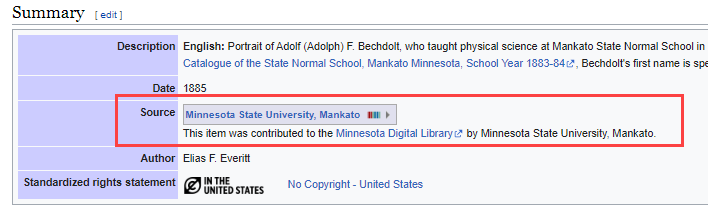
- For the Standardized Rights Statement, we utilized No Copyright - United States for our images and we added the No Copyright United States URI: http://rightsstatements.org/vocab/NoC-US/1.0/
Adding Structured Data
Linked Data is a set of best practices for publishing and connecting structured data on the web. Adding linked or structured data in Wikimedia Commons is intended to make the content more machine-readable, and has many benefits to end-user searching and browsing. However, many items in Wikimedia Commons do not have structured data yet, but following the path of DPLA, we chose to add some structured data to our items to see how they could be linked together. We created the Wikimedia Pilot Structured Data Guidelines to help guide us.
After you add the metadata, the next section in the Upload Wizard is to Add Data or add Structured Data. The properties and values entered into this section are selected from Wikidata and are referred to as Structured Data Statements. The order of the statements does not matter as Wikimedia Commons will arrange them into their preferred internal order once you are finished. Each item that you upload to Wikimedia Commons will be automatically assigned one structured data statement and that is depicts (see the video below). Add more statements by clicking on “Add Statement” and then search Wikidata to find the properties that you want to add.
In the pilot project, we added the following properties to our Structured Data statements, but more can be added of course!
- depicts
- inception
- creator
- source of file
- copyright status
- main subject
Watch this video to see how it works. Note, there is no sound in the video.
When you have finished adding all the structured data categories and information to your item, click on “Publish data for all files” at the bottom of your screen.
Congratulations! At this point, you have successfully uploaded a file to Wikimedia Commons and added descriptive information and structured data.
Wikipedia Article Linking
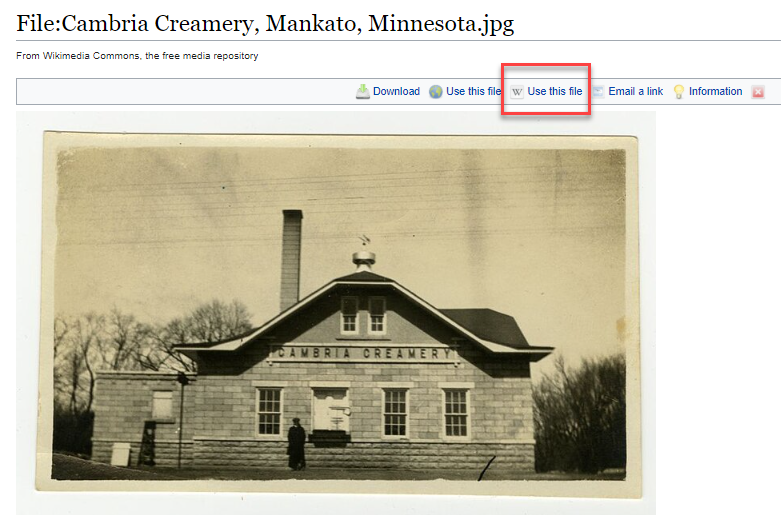
After uploading a file to Wikimedia Commons, it can be linked to Wikipedia articles. This both enhances the Wikipedia article and expands the reach of your Wikimedia Commons file. Files can be linked to Wikipedia articles in a few ways. For smaller Wikipedia articles, files can be incorporated into the text of the article. Larger articles may have a dedicated “Media” or “Gallery” heading. To link the file, begin by selecting “Use this file” at the top of the file’s Commons’ page and copying the provided thumbnail link.
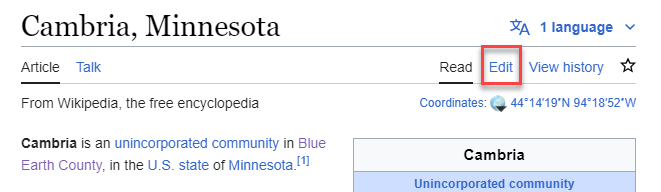
Then, find the Wikipedia article you plan on adding the file to and click “Edit.”
In Article
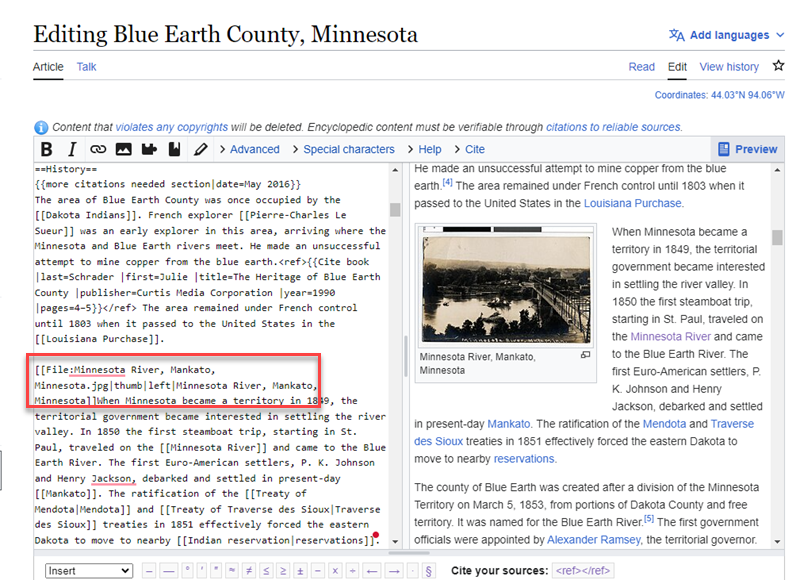
To place the file within the text of an article, decide where the file should go and paste the link within the wikitext in the Source Editor. Add a “left” or “right” indicator to position the file.
Example: [[File:Minnesota River, Mankato, Minnesota.jpg|thumb|left|Minnesota River, Mankato, Minnesota]]
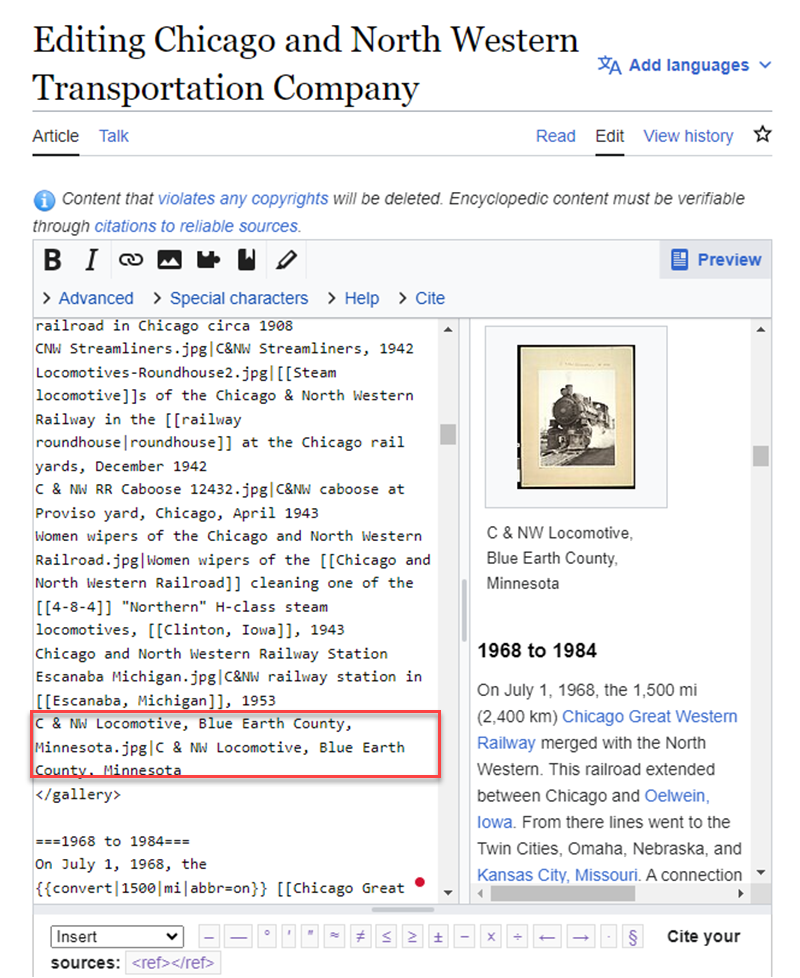
In Media/Gallery Heading
To add the file to the Media or Gallery heading of a Wikipedia article, copy the provided image link from Wikimedia Commons and paste it within the section. Only the file name is required to add the file to this section.
Example: C & NW Locomotive, Blue Earth County, Minnesota.jpg|C & NW Locomotive, Blue Earth County, Minnesota
We have found that files linked to Wikipedia articles tend to receive more views than media only uploaded to Wikimedia Commons.
For additional information, visit North Dakota State Library’s Workflows for Contributing Content to Wikipedia/ Wikimedia Commons document or Wikipedia’s Help page.
Summary
The pilot was a learning process, with a lot of trial and error, but we also had fun working together. The time we initially put into the pilot was minimal compared to what we got out of it. We all now have workflows, templates, and the knowledge to continue this work and build upon it. What we found that worked for us at this moment in time, may not work exactly the same for other organizations that wish to work on a similar project, but we hope the information we’ve shared is useful. There is a community of people out there interested in doing this type of work, including ourselves. Please reach out if you have questions about the pilot or would like to talk about possible future projects!


.jpg)